Could this be root cause? solved but some new codes-need hose identified
- Sopey52
-
 Topic Author
- Offline
- Junior Member
-

- Posts: 36
- Thank you received: 0
Video when I was able to get it started today after 3 times with a no crank.
Video 2 shows No Crank after it shut off after I ran out of storage on my phone for the first video. Ran for 7 to 8 minutes.
its a no crank at this point. It is always either a no crank or a no start because sometimes it does crank and will not start.
Once I get it to start, it will run for 2 maybe 7 minutes and then shuts off and then it is a no crank until maybe I can get it to a no start or it starts and eventually shuts off again. Seems like security does have something to do with it. If I lived close enough I would bring it to Scanner Danner's Garage but I would like to be able to finally figure this out on my own and pat myself on the back if it does not mean I have to invest a lot of money figuring it out vs I should have taken it to someone else or just give up and ship it to the salvage yard.
Please Log in or Create an account to join the conversation.
- Chad
-

- Offline
- Moderator
-

- I am not a parts changer.
- Posts: 2181
- Thank you received: 732

"Knowledge is a weapon. Arm yourself, well, before going to do battle."
"Understanding a question is half an answer."
I have learned more by being wrong, than I have by being right.
")
Please Log in or Create an account to join the conversation.
- Sopey52
-
Topic Author
- Offline
- Junior Member
-
- Posts: 36
- Thank you received: 0
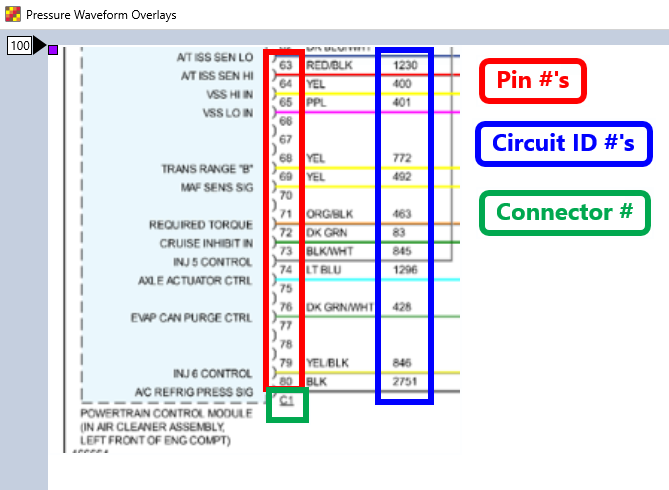
I need to ask a dumb question, because I am not a mechanic. Are all the numbers on the sides of the wiring diagrams pins going into the PCM?
Also, looking at that first attachment, I think I need to look at G111 to ignition which is on other side of starter that I can’t get to yet until I get a jack. This van looks nice but my rockers are putty.
I’ll start with G113 and G111 and see what happens.
Thanks very much.
Please Log in or Create an account to join the conversation.
- Sopey52
-
Topic Author
- Offline
- Junior Member
-
- Posts: 36
- Thank you received: 0
I had a used transmission put in this van a few years ago. I know that two thin black/white ground wires are joined together onto the same Ground location but I do not know if this location is G111, or G117.
Update, later same day: I will end up sounding like an idiot but I am not a mechanic. G113 is easy to find, to the left of the starter because the negative battery terminal connects to it. I am not sure if the ground behind it and slightly above it is G111 or G117. Either way, the small black/white ground wires I am concerned about (don't know which is which) are what I believe to be one that is from the PCM and one that is from the ICM. I separated them. One needs to go to G113 and one needs to go to G111. Both were connected to G111 if it was not G117. An earth strap that did not look so good was also connected to G111 or G117 and I decided to break it. I am going to replace it. If I am confusing anyone reading this, its because I am totally confused because I am only able to see two ground locations where they wiring diagrams say there should be 3 relatively close to each other.
Please Log in or Create an account to join the conversation.
- Chad
-
- Offline
- Moderator
-
- I am not a parts changer.
- Posts: 2181
- Thank you received: 732
Yes.Sopey52 wrote: Are all the numbers on the sides of the wiring diagrams pins going into the PCM?
If I have the black/white ground from PCM joined with black/white ground from ignition control module and connected to same G111 instead of one to G113 and one to G111, would that be a problem.
I don't see where that would be a problem, as long as there is a good connection, ultimately, with the negative battery post.
"Knowledge is a weapon. Arm yourself, well, before going to do battle."
"Understanding a question is half an answer."
I have learned more by being wrong, than I have by being right.
Please Log in or Create an account to join the conversation.
- Sopey52
-
Topic Author
- Offline
- Junior Member
-
- Posts: 36
- Thank you received: 0
Please Log in or Create an account to join the conversation.
- Sopey52
-
Topic Author
- Offline
- Junior Member
-
- Posts: 36
- Thank you received: 0
So this is Scanner Danner's video on the new codes
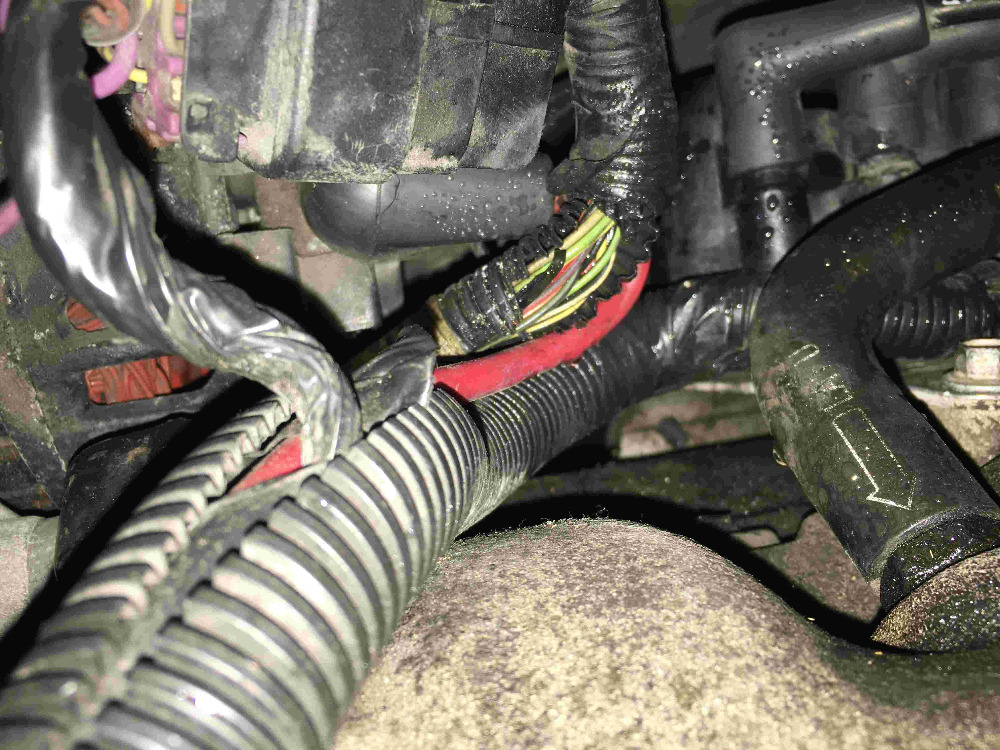
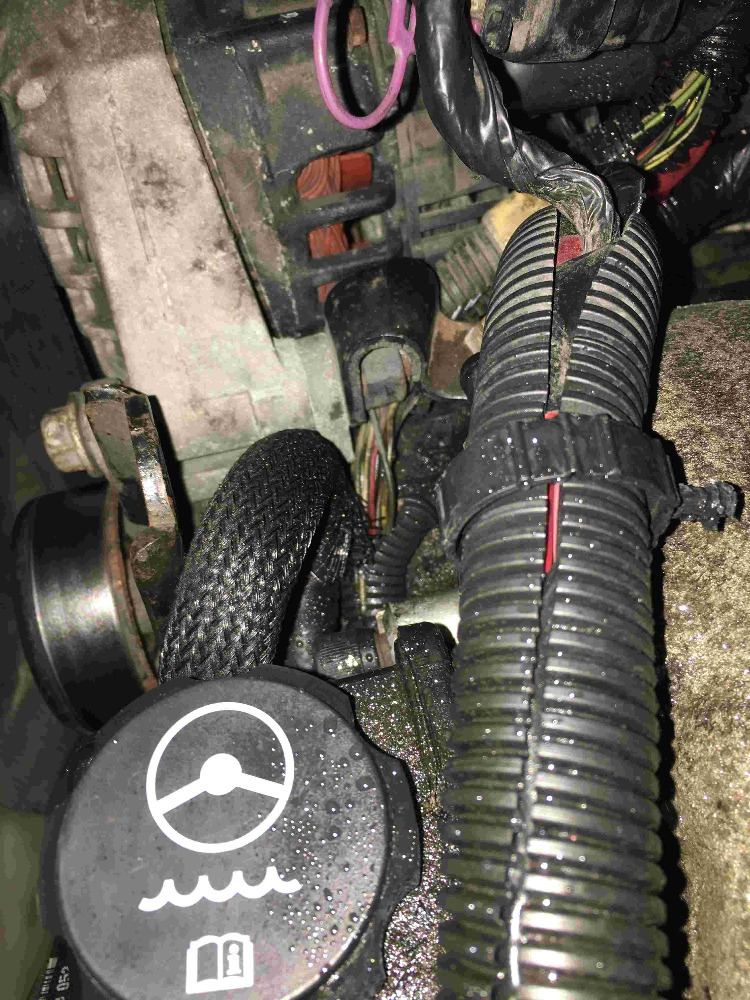
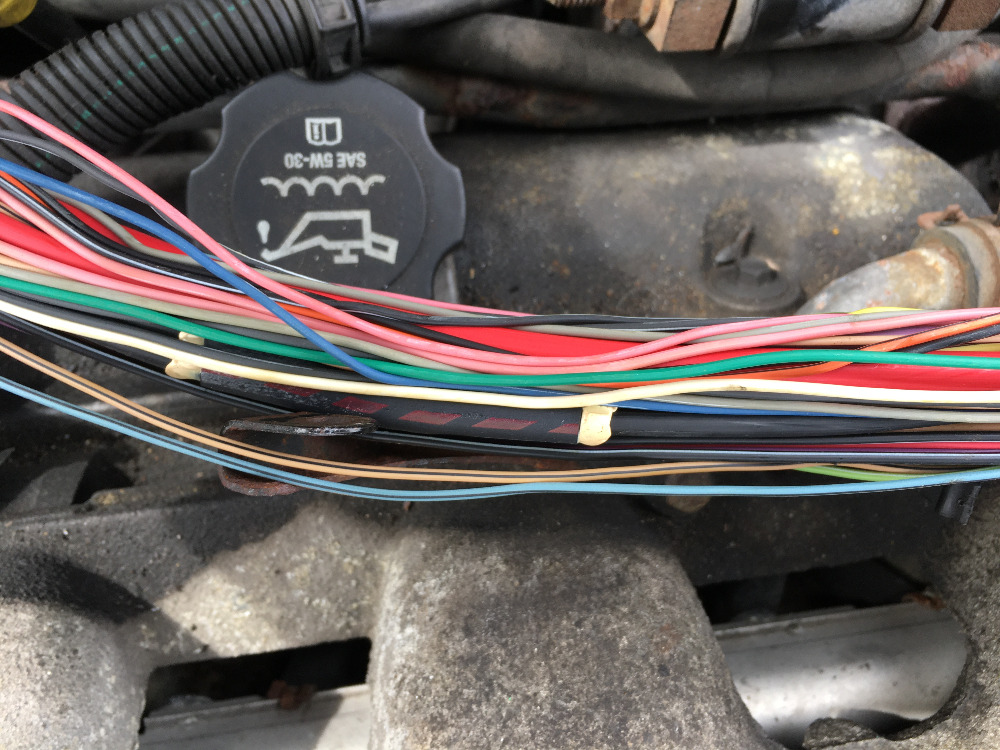
I just made a video today showing I have melted conduit in the same area but I cannot see any exposed copper or shorted wire. I need to upload it and show you here.

Please Log in or Create an account to join the conversation.
- Sopey52
-
Topic Author
- Offline
- Junior Member
-
- Posts: 36
- Thank you received: 0
Please Log in or Create an account to join the conversation.
- Nelson60
-
- Offline
- Junior Member
-
- Posts: 31
- Thank you received: 13
2,A good place to check(if it is a no crank/no start_ is at the relay. starter relay
Check the control side and load side of the relay. Paul has many great videos explaining this. There is a way to jump across the relay and provide power to the starter at the relay BUT you have to be careful or you will damage the PCM.
3, The warning lights/low fuel gage reading, along with relay clicking in the Fuse box makes me suspicious of a poor ground condition. As a quick test, connect on end of a battery jumper cable to the battery negative and the other end of the same cable to the engine block. See if the van will now crank. You can also move the ground from the engine block to the firewall to see if it will crank and/or if the warning lights go OUT if you get it started.
4. Be aware of broken/poor crimps at small ground eyelets. Just because it looks good, doesn't mean it is. Paul had a recent video a while back where they found a problem due to a poor ground eyelet being the culprit.
5. I watched your videos, but it was not clear if you are currently missing a 5v ref signal when you tested for it.
Keep us posted.
PS. You have a test light also?
Please Log in or Create an account to join the conversation.
- Sopey52
-
Topic Author
- Offline
- Junior Member
-
- Posts: 36
- Thank you received: 0
One basic that I cannot review due to I can't get under the van until I get a good jack (because my rockers are shot and I don't trust using the jack that came with it) to safely place the jack stands I recently purchased....I need to inspect the positive side of the starter and that end of the positive battery cable. I was able to get to the negative side and clean up the negative terminal from above but I can't get to the positive side.
I am assuming its a 5v short because I have been through the grounds several times and so have at least 4 other mechanics ever since the gremlin started. I say stuff here, maybe I don't know what I am talking about, but I am trying.
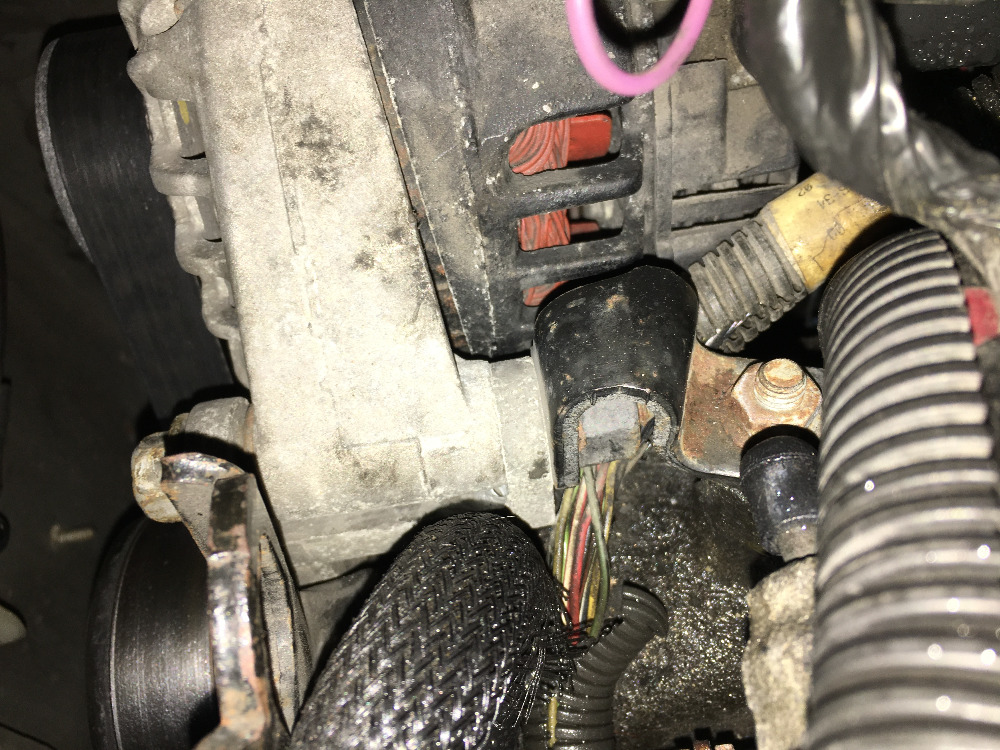
While I am waiting for my cam shaft sensor to arrive, I am going to finish inspecting all plugs and connectors to ignition and throttle boddy. I need to repair that plug on the alternator because that one wire (does not show up in camera) is almost completely cut. Hopefully I can do it the same way Paul shows on a video, otherwise I need to buy a replacement plug. Once I get this all put back together I will go back through your steps and suggestions if that plug or anything else i find before wrapping wire back up does not solve the problem.
I was hoping for suggestion on how to repair that plug but I think I can pop the pins out and rewire them. I never did that before but I have been inside wifi routers. I can solder, etc, if I can hold my hands still enough. I'm getting old and am banged up.
")
Please Log in or Create an account to join the conversation.
- Sopey52
-
Topic Author
- Offline
- Junior Member
-
- Posts: 36
- Thank you received: 0
Please Log in or Create an account to join the conversation.
- Sopey52
-
Topic Author
- Offline
- Junior Member
-
- Posts: 36
- Thank you received: 0
Please Log in or Create an account to join the conversation.
- Sopey52
-
Topic Author
- Offline
- Junior Member
-
- Posts: 36
- Thank you received: 0
Please Log in or Create an account to join the conversation.
- Nelson60
-
- Offline
- Junior Member
-
- Posts: 31
- Thank you received: 13
I find it difficult, and frustrating most times with trying to help online due to the fact I don't have the vehicle in front of me to personally see, hear, and feel the variables affecting it. I guess I would be a failure at a call center for auto troubleshooting.
The purchase of Paul's book will pay for its self in keeping your fleet running and out of the shops. Don't let the content overwhelm you, take a little bite out of it and practice some of the techniques and tests shown.
Glad to hear your daughter is fine after the recent crash.
Post back any questions you might have on a future car purchase you may be considering.
Nelson
Please Log in or Create an account to join the conversation.
- Sopey52
-
Topic Author
- Offline
- Junior Member
-
- Posts: 36
- Thank you received: 0
DOES IT MAKE A DIFFERENCE WHERE THE GROUNDS ARE LOCATED?
On this 2003 Chevy Venture, G113 and G111 ( I just figured out) are on the same bolt and separated by nut. Thus there are two nuts on that bolt. I found a drawing online that proves it. G117 is slightly behind and above it. There are ground wires connected to 113 that are solid and clean looking and I can pull on them pretty hard. They stay connected. I cannot tell the difference between two identical looking, thinner ground wires that are around 20 or 18 gauge coming out of the same place in the loom. One of them is supposed to go to G111. and one is supposed to go to G117.
An earth ground was going to G117. I replaced it because it was corroded. Because I did not get any results, I decided to move it to G111.
My grounds may just be in the wrong place and/or I may have improved the ground wire connections but also screwed them up by putting them in the wrong place. Is there an easy way to test and figure out where each ground wire goes to besides tearing apart all the wire loom which is what a novice like me might have to do?
Also, if I replaced the earth cable from block to driver side of body opposite of battery and then I moved it from G117 to G111 as an experiment. Could I have created a new problem because G111 is on the same bolt as G113 and battery negative connects to G113?
So far i have improved the run time, I got rid of the security light. I still get a Battery and Low Fuel light. Once the van shuts off, it kind of acts like maybe I have a bad alternator but the alternator tests at 14.59 volts when running. After the van has stalled, the fuel pump will turn on and turn off an turn on and turn off but there is space between the on times and it no longer ends up sputtering on and off like a machine gun but it does have a sputter in it some times, just not nearly as extreme.
I hate going back and revisiting these ground wires because I have to remove the air box which includes unplugging mass airflow and removing 1/2 of the air intake hows with the air box and that is not easy at all because it is tightly surrounded by a fork of wire loom as the PCM sits on top of the air box. However, my problem needs to be ground wires or I am giving up and the van is going to junk yard.
How can I most easily figure out that I have the right ground wires in the right location?
Please Log in or Create an account to join the conversation.
- Tutti57
-

- Offline
- Platinum Member
-

- Posts: 1098
- Thank you received: 253
The battery ground goes to the frame or chassis or whatever, and makes those parts also the ground, which is why it doesn't matter where it is.
As far as the alternator putting out 14v, it's possible that it's not enough current, but still shows the higher voltage. That same power and ground tests applies to the alternator. I bet a lot of alternators are replaced that just have a bad power connection or something, then they unknowingly fix the problem when they replace it.
Some research in voltage drop testing will help you out with your ground tests. Paul has some videos on it for sure.
Sent from my moto g fast using Tapatalk
Please Log in or Create an account to join the conversation.
- Sopey52
-
Topic Author
- Offline
- Junior Member
-
- Posts: 36
- Thank you received: 0
I was concerned that could happen if a ground is in the wrong place.
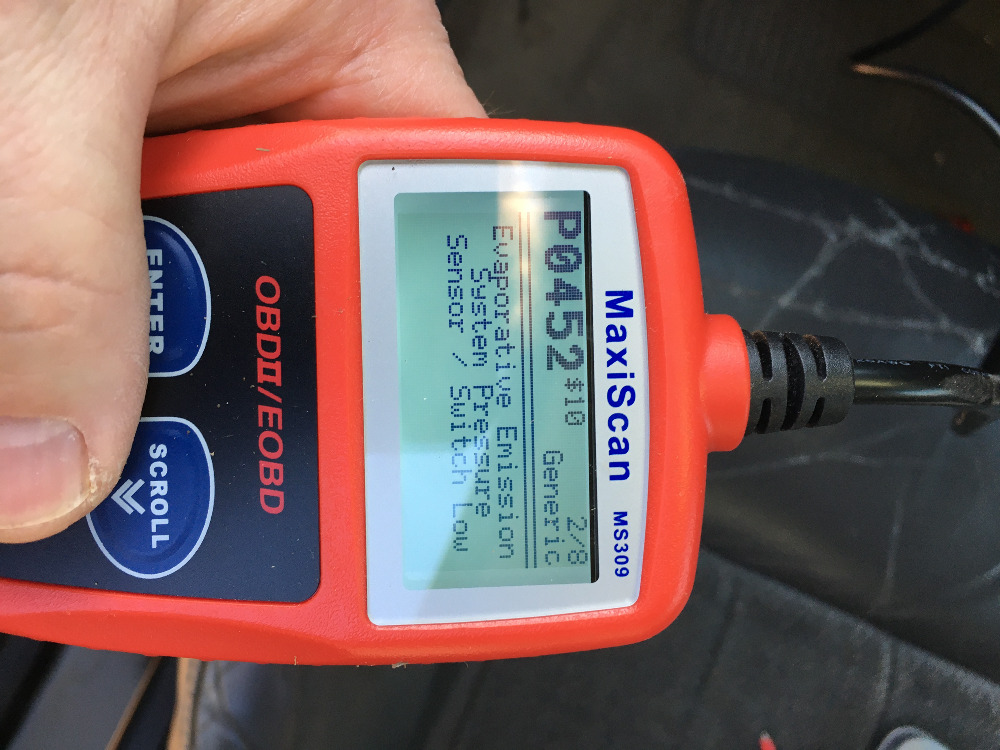
This Chevy venture has error codes that I will attach and it has evidence of patchwork done by previous owner within the wire loom. I will avoid reposting my videos of my decade long saga with reappearing elecrical gremlins which have now manifested themselves into the van begging to be sent to the junk yard because it has 200,361 miles on it. I thought I could maybe figure this problem out myself without having to put more money than its worth into it. I might as a question here and there but I do not think this van issue is a ground issue anymore. I was getting battery/low fuel/security and I managed to get the security light out of that equation. I do have fuel pump that wants to turn off and on and off and on when the van is not running when the key is in run. I at least got that issue to stop sounding like a machine gun with the fuel relay and fuel injectors included.


Please Log in or Create an account to join the conversation.
- Tyler
-
- Offline
- Moderator
-
- Full time HACK since 2012
- Posts: 6124
- Thank you received: 1541
Let me catch up with what you've posted so far.

Please Log in or Create an account to join the conversation.
- Tyler
-
- Offline
- Moderator
-
- Full time HACK since 2012
- Posts: 6124
- Thank you received: 1541

Doesn't really matter, 'cause I think you should stay on this path:
I do have fuel pump that wants to turn off and on and off and on when the van is not running when the key is in run.
That's a perceptible symptom that can we can use to get some good direction. It's also conveniently testable from the underhood fuse box.
With the off/on symptom present, pull the fuel pump relay slightly out of it's socket. Not enough to disconnect the relay from the fuse box, just enough to get to the relay terminals with your multimeter.
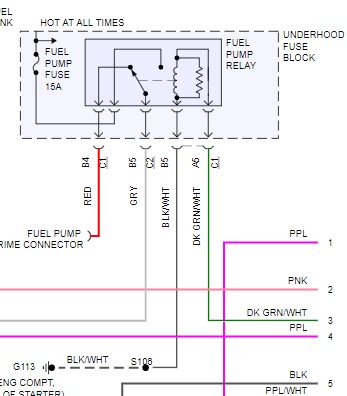
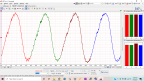
Take voltage readings at all four terminals, long enough to witness at least one off/on cycle. Take note of the readings and report back. At least one is going to be changing.
Use the relay diagram on the top or bottom of the relay itself to tell you which terminal is which. Do not use a test light.If getting to the relay terminals isn't possible, you can use the old trick of removing the relay and tying individual copper wire strands around each of the relay terminals before reinstalling. Just make darn sure not to let the strands touch each other or anything metal.
There are also kits like this that make relay testing a breeze:
www.amazon.com/Lisle-56810-Relay-Test-Jumper/dp/B002MCX6LY/
Please Log in or Create an account to join the conversation.
- Matt T
-
- Offline
- Platinum Member
-
- Posts: 751
- Thank you received: 276
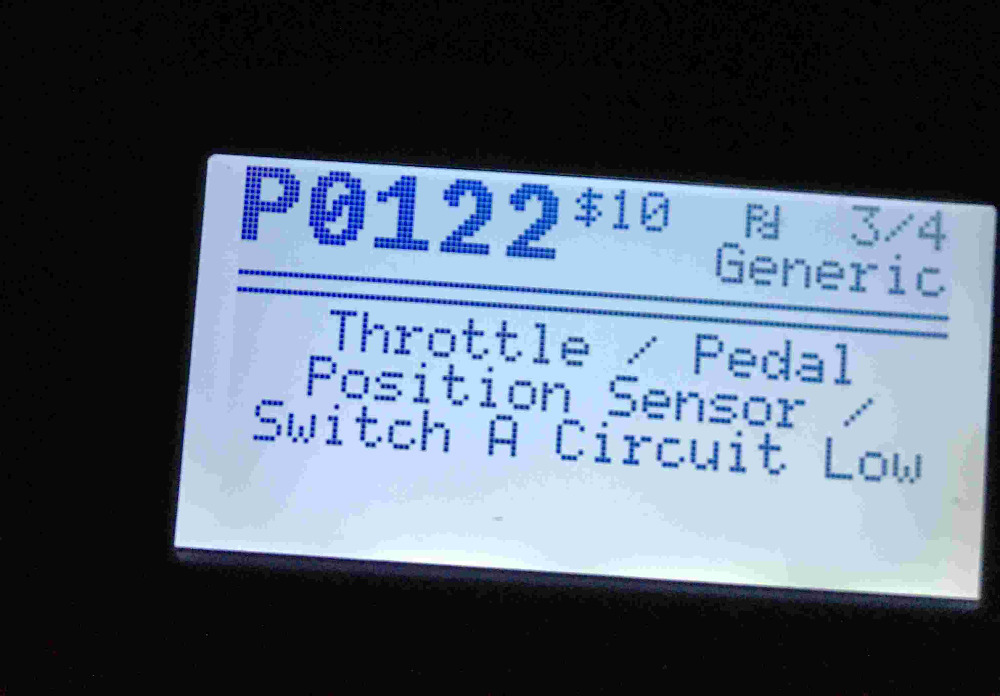
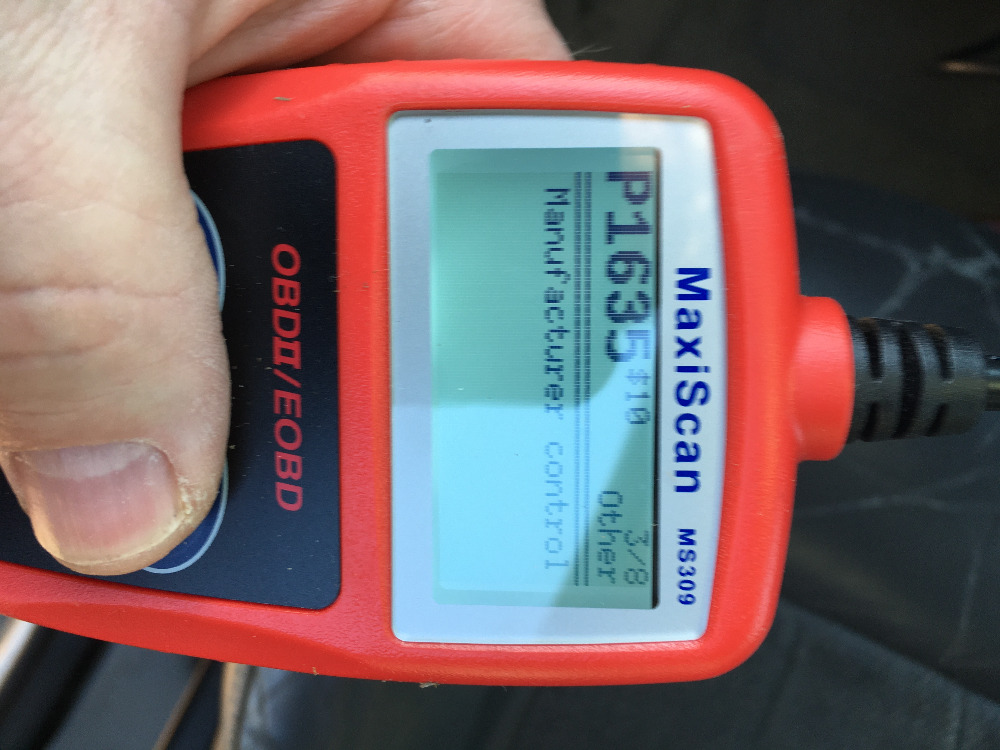
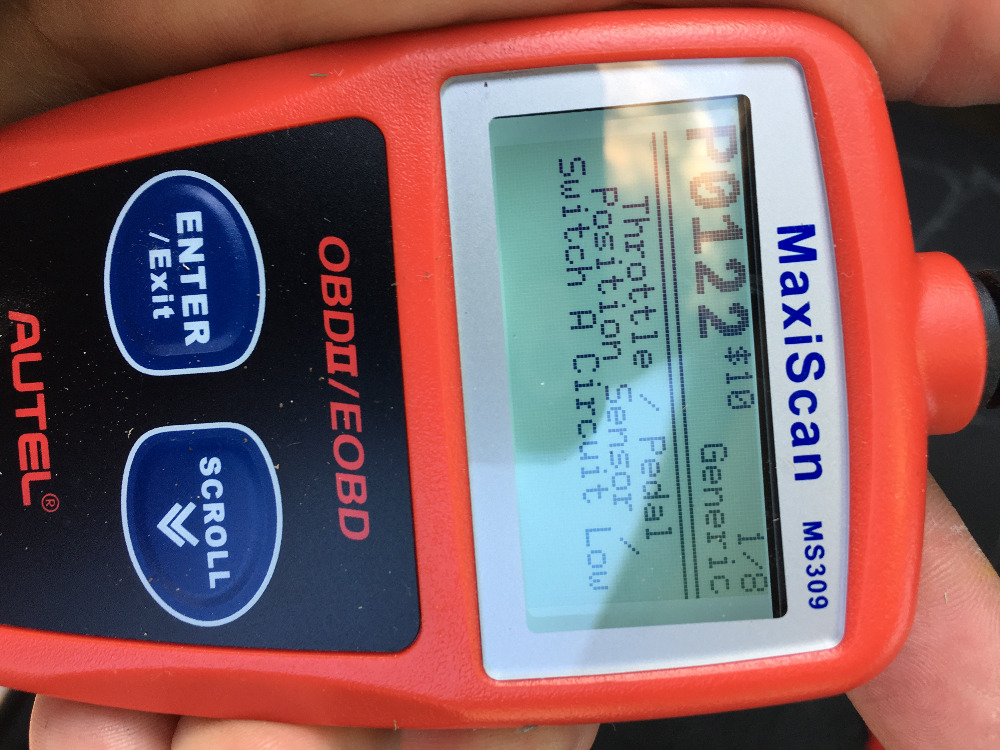
Sopey52 wrote: This Chevy venture has error codes that I will attach and it has evidence of patchwork done by previous owner within the wire loom.
Those four codes are all 5 volt reference related. It's possible they've been set by testing so first thing I'd do is clear them out and see if they come back.
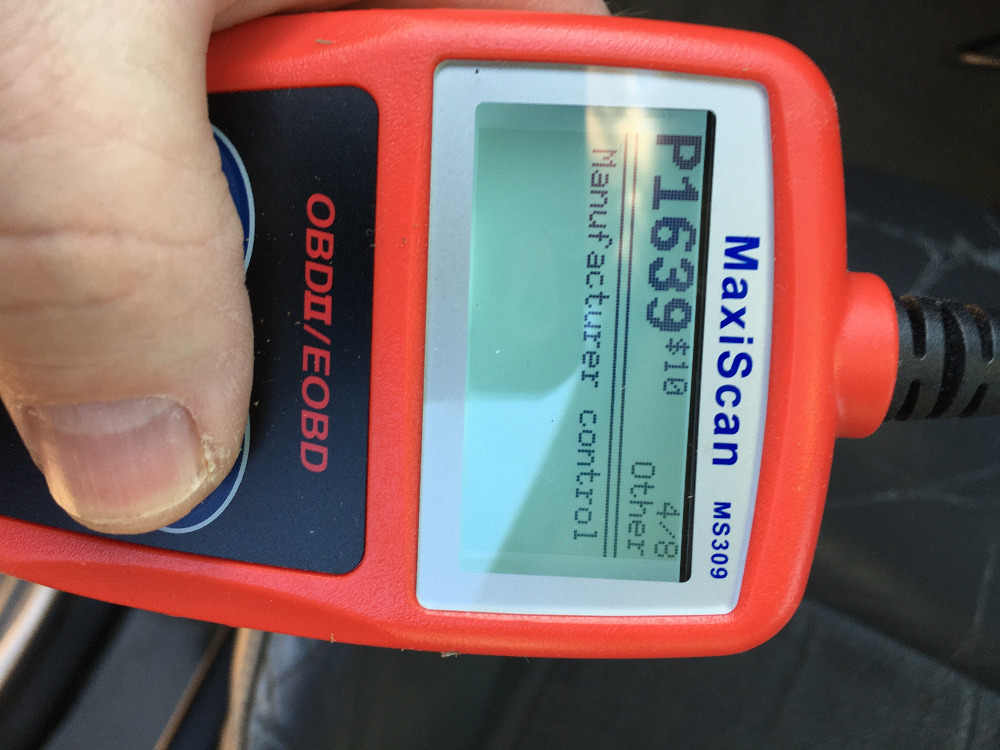
SI for P0122 and P0452 says if P1635 is also set troubleshoot it. Found this "diagnostic aid" for P1635/9.
If any sensor using a 5-volt bias voltage, such as the intake air temperature (IAT) sensor or fuel level sensor, is shorted to voltage, DTC P1635 may set in addition to DTC P1639.
This might be a rabbit hole but it'd be worth checking the 5V and low reference circuits.
Please Log in or Create an account to join the conversation.